The Wall Reinvented
From a towering, cluttered oak entertainment center to a sleek modern media wall — built to entertain, store, and serve.
13ft
Wall Width
100%
DIY
3
Design Goals
From a towering, cluttered oak entertainment center to a sleek modern media wall — built to entertain, store, and serve.
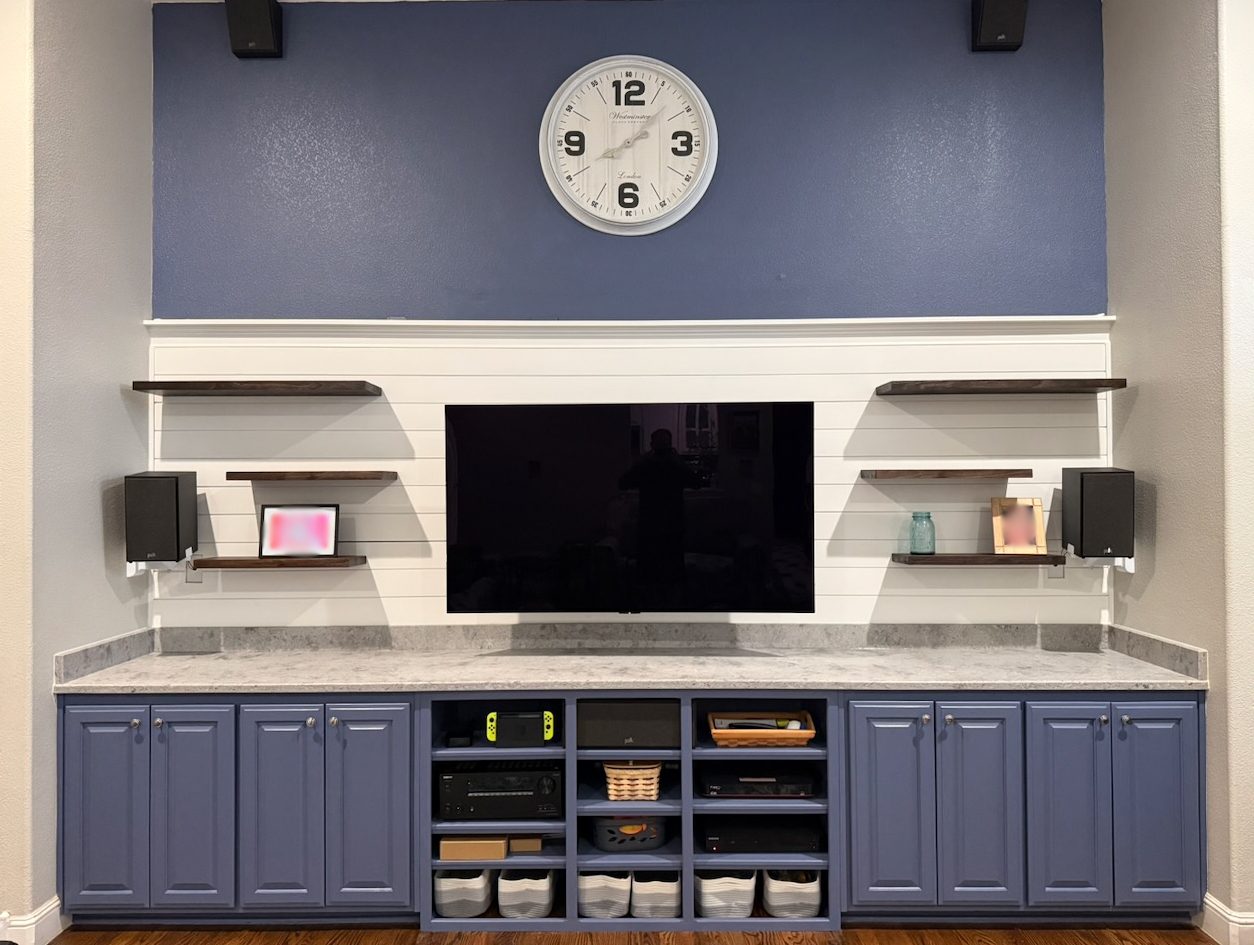
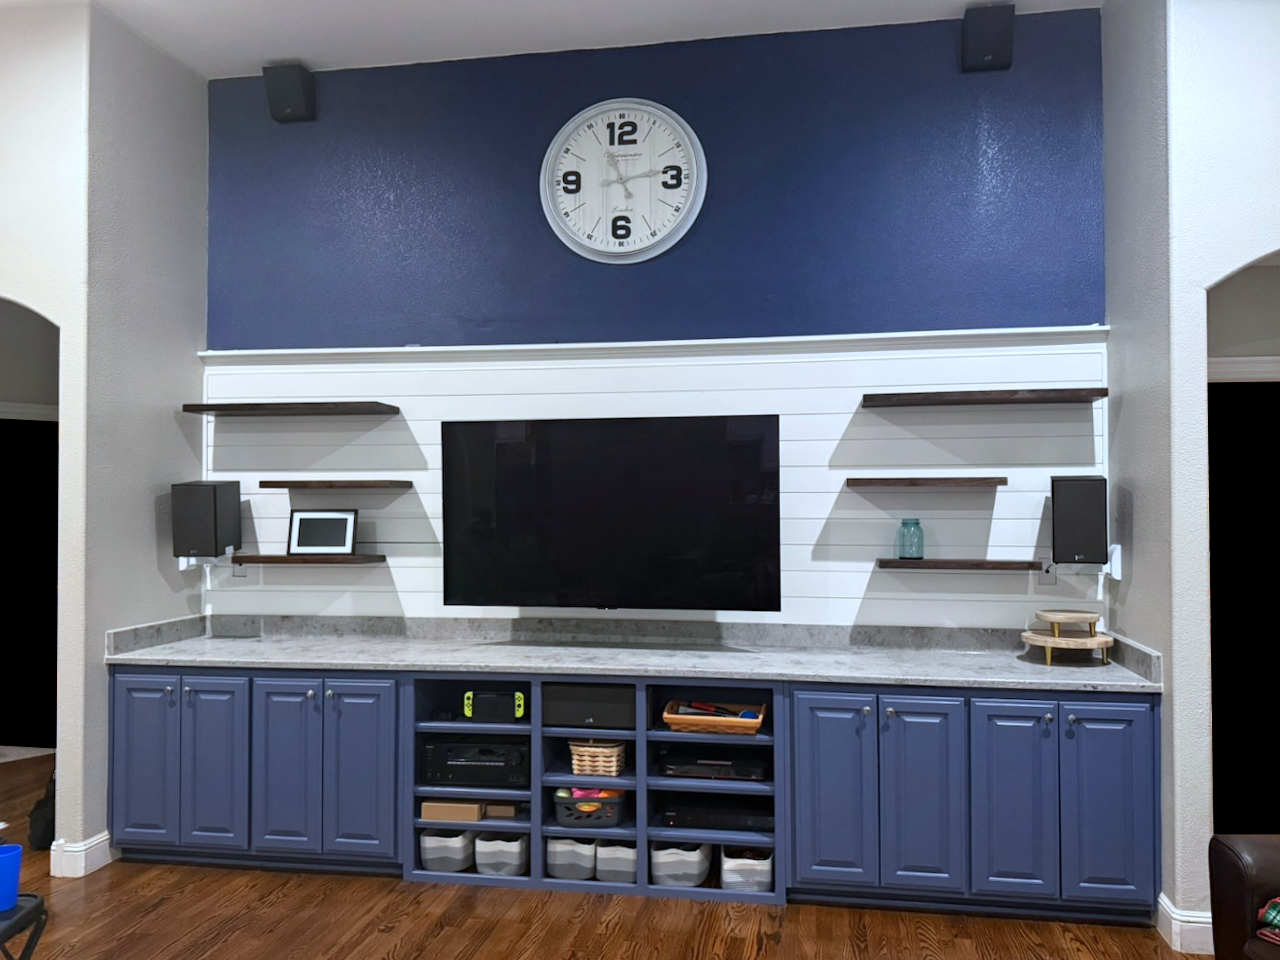
The Vision
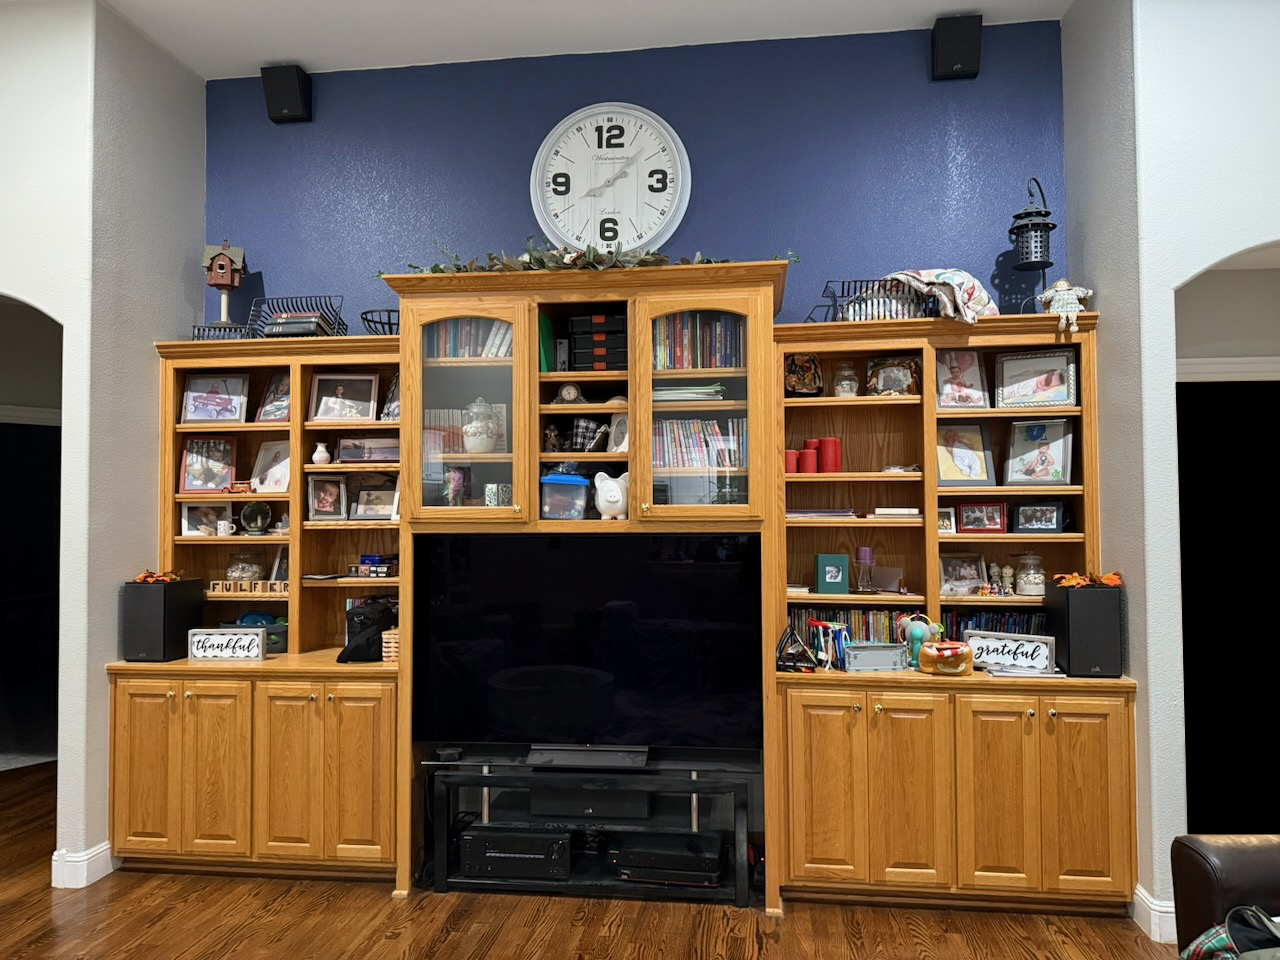
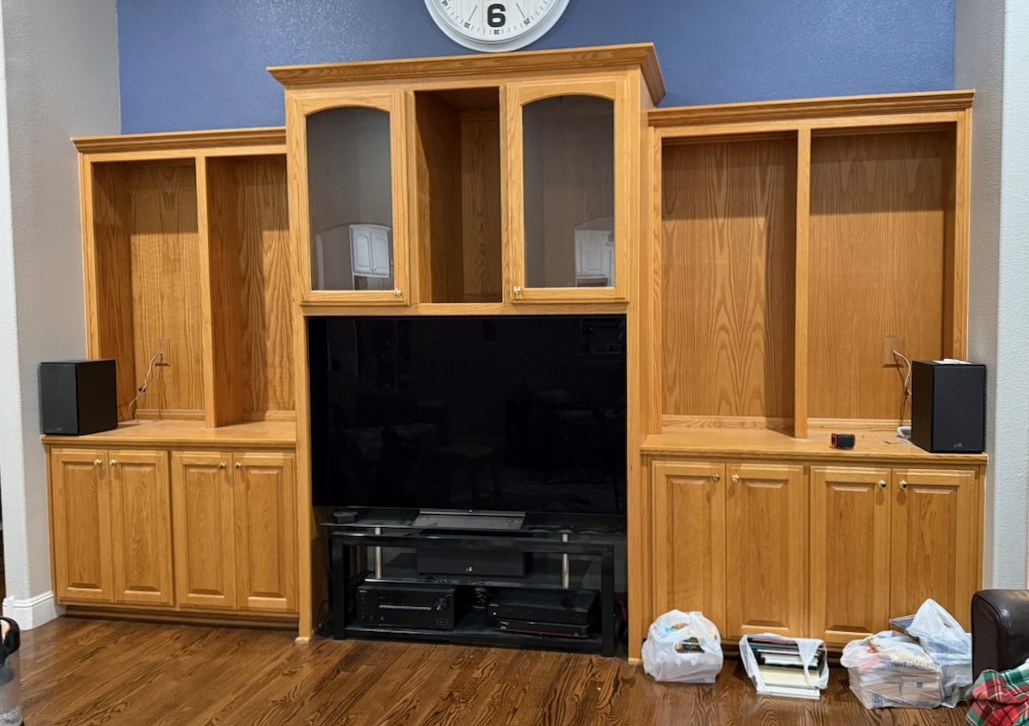
Our living room had been dominated by a massive built-in oak entertainment wall for years. It was functional, but dark, dated, and overflowing with stuff. We wanted something completely different: open, modern, and deliberately designed to double as a serving counter when family gets together.
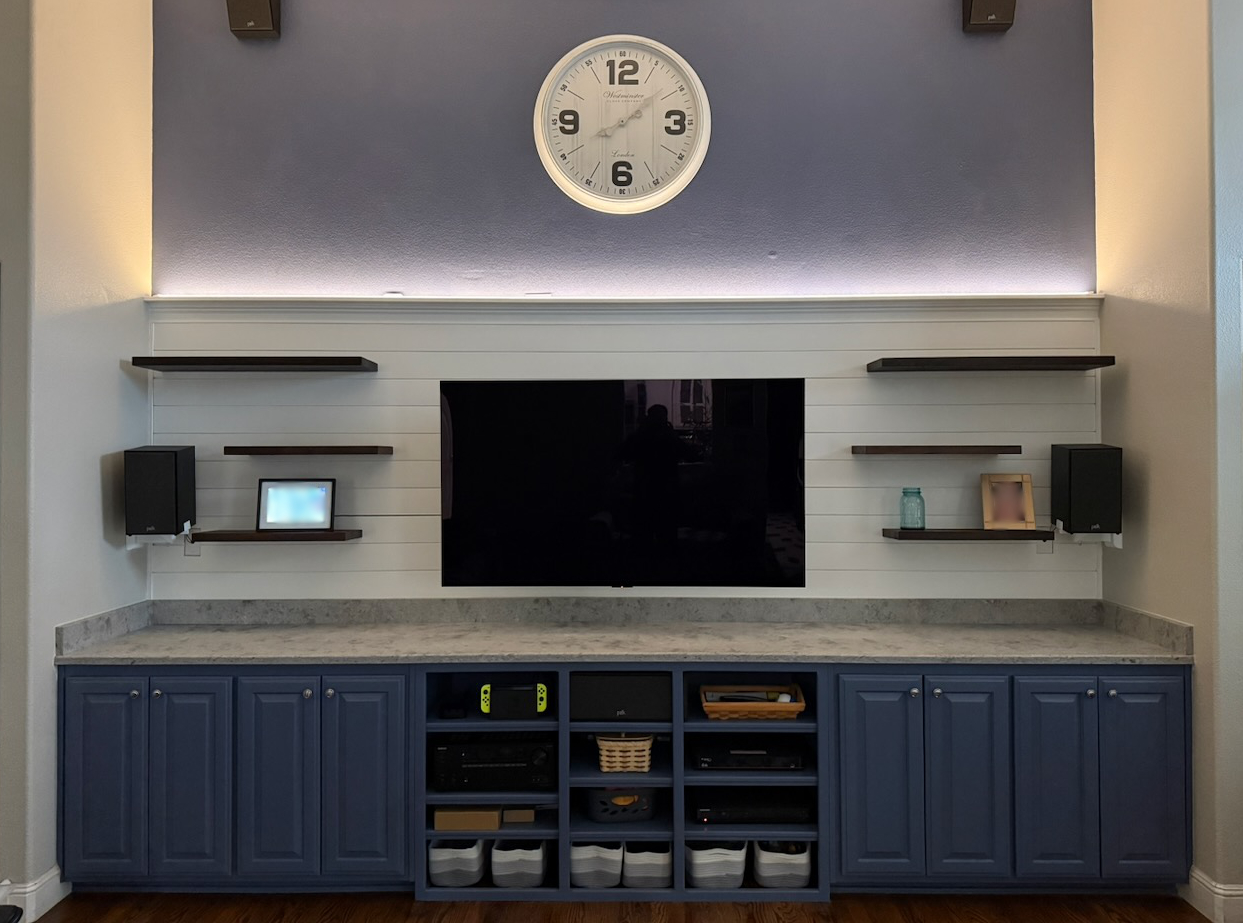
The result? A wall-to-wall Distance Blue media console with a quartz countertop, white shiplap paneling, floating walnut shelves, and a TV mounted flush to the wall.
◆ Blueprint ◆
Designed in 3d before a single tool touched the wall.

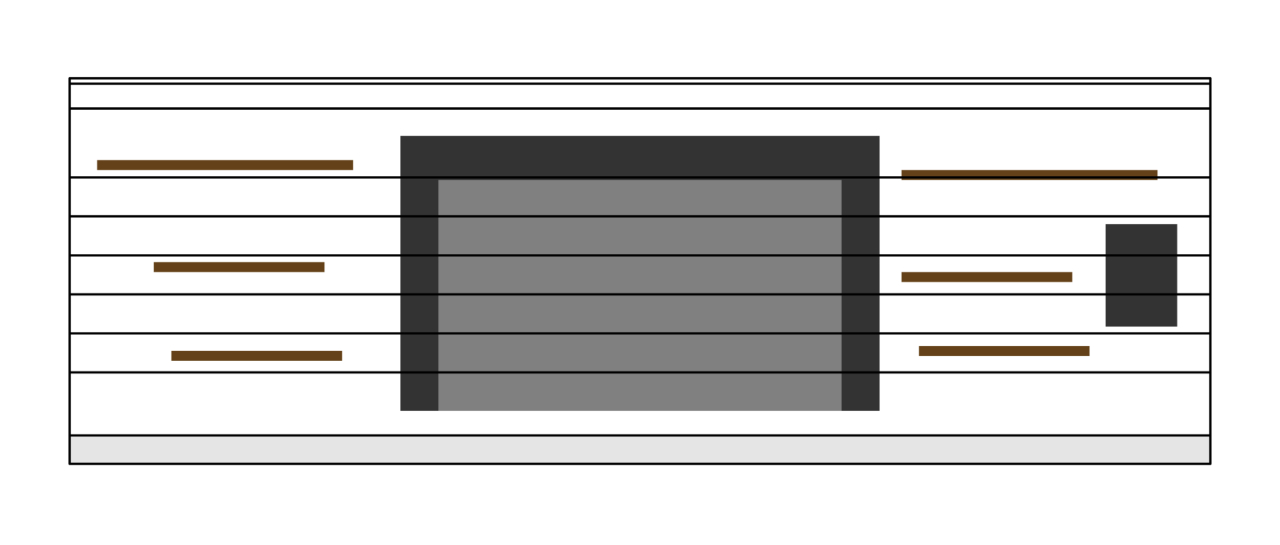
Elevation Diagram
Front-view layout: Location of floating walnut shelves locked in before install.
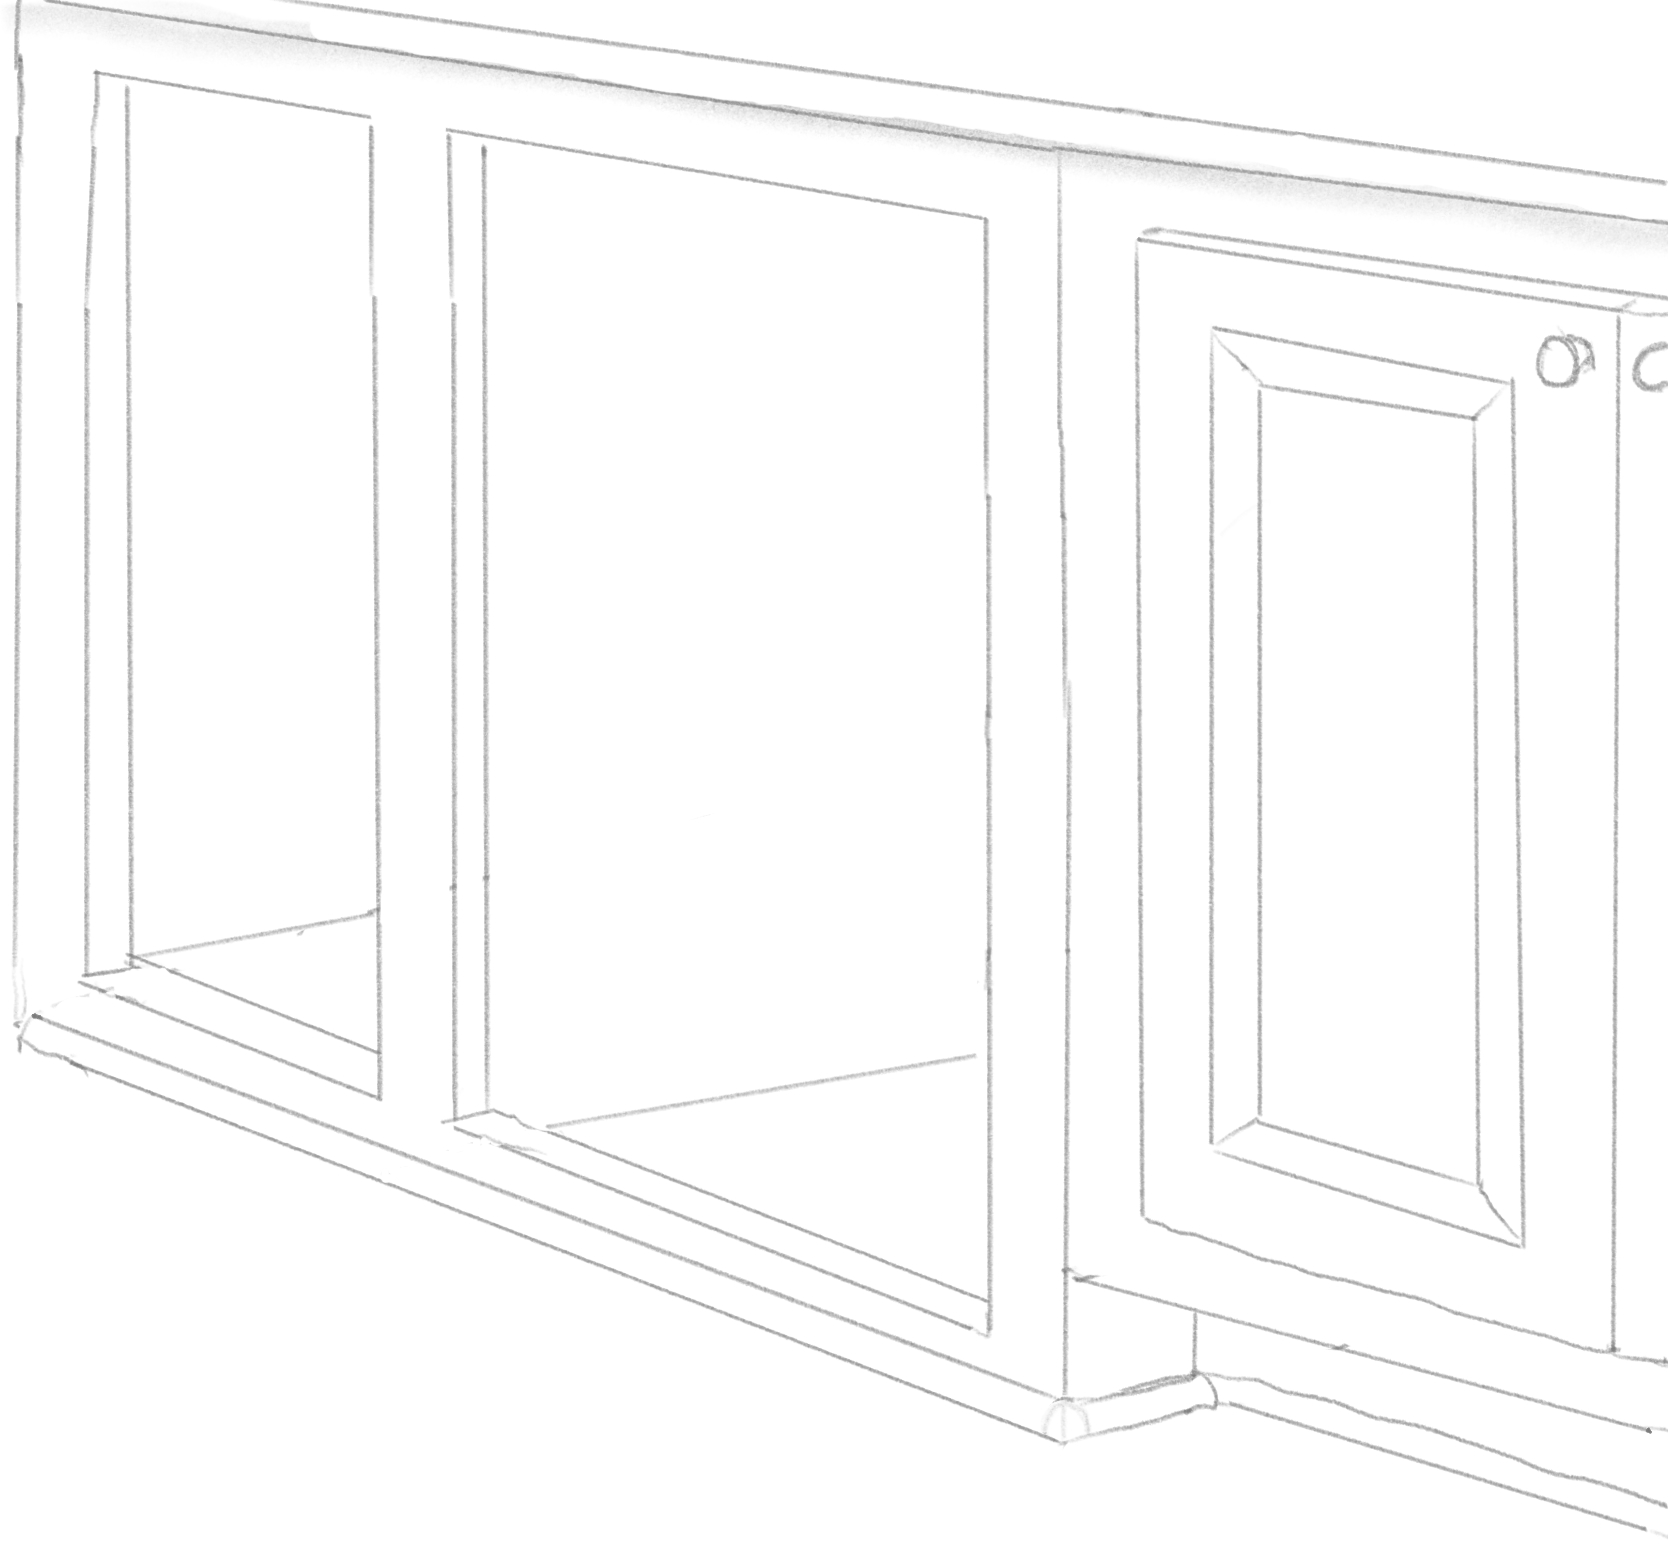
Cabinet Detail Sketch
Hand-drawn perspective of the lower base unit — open media bay flanked by raised-panel cabinet doors.
Before & After
The original entertainment center filled most of the wall up. The transformation strips all that back.
Step by Step
Phase 01 — Demo Begins
First things first: everything off the shelves, then the upper hutch sections came down piece by piece. The lower base cabinets were solid and level, so we made the decision early to keep them and repurpose them as the new foundation.
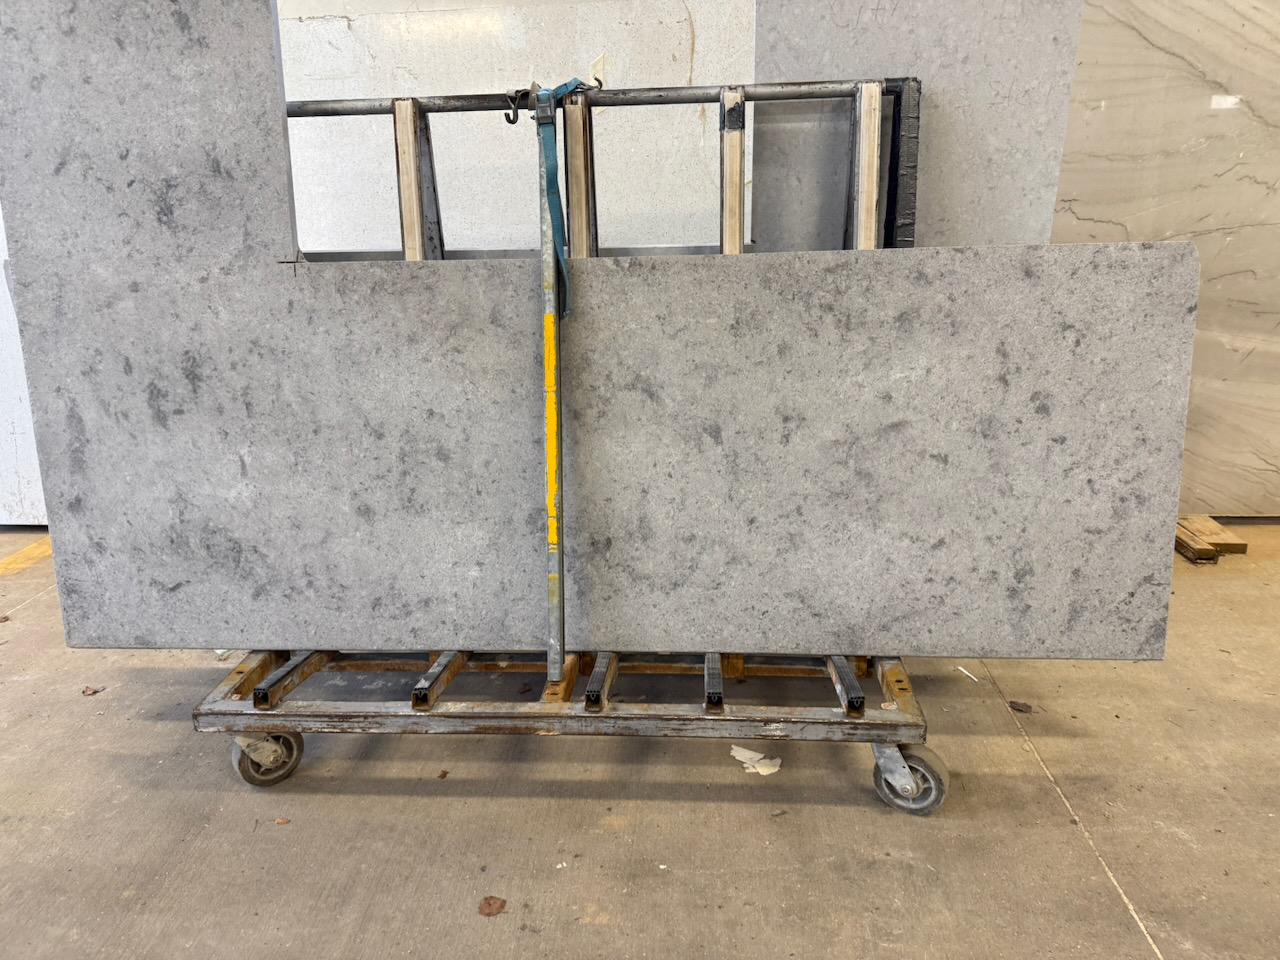
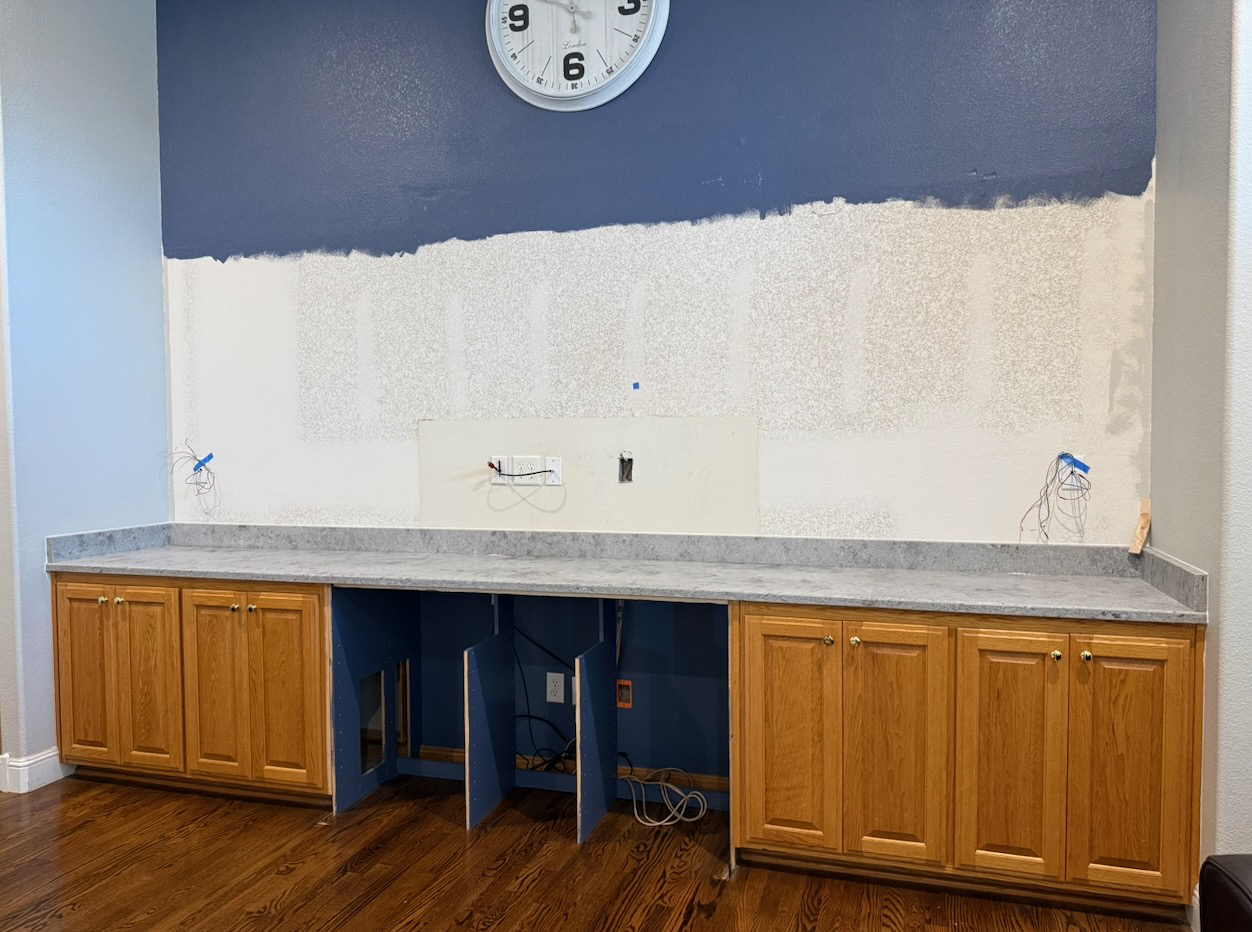
Phase 02 — Countertop
We headed to the stone yard and hand-picked a gray-speckled quartz slab. The soft, cloudy pattern bridges the Distance Blue cabinetry and white shiplap without competing with either. Durable enough to handle party food — and easy to clean up after.
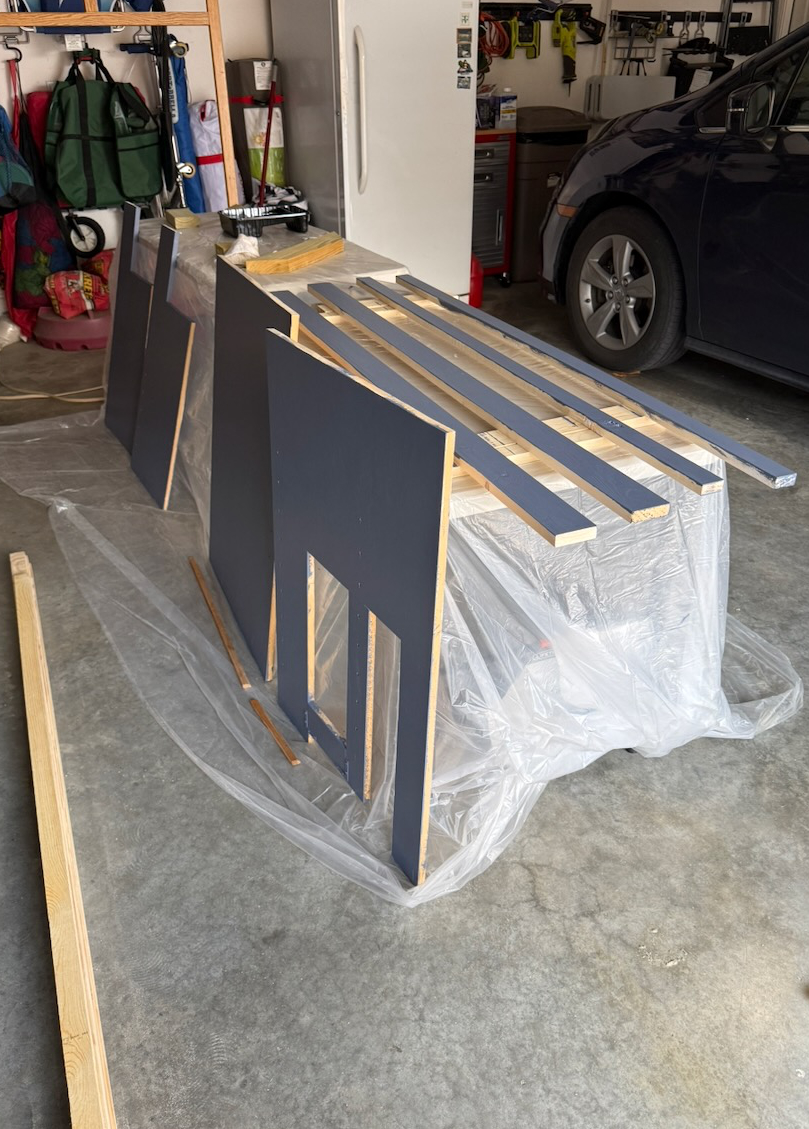
Phase 03 — Paint & Panel Prep
All new cabinet panels, the media center carcass, and the interior shelving were painted with a smooth finish brush and lightly sanded through several steps to get that furniture-grade smooth look. The Distance Blue matched the accent wall color almost exactly, so the cabinets blend into the wall rather than sitting in front of it.
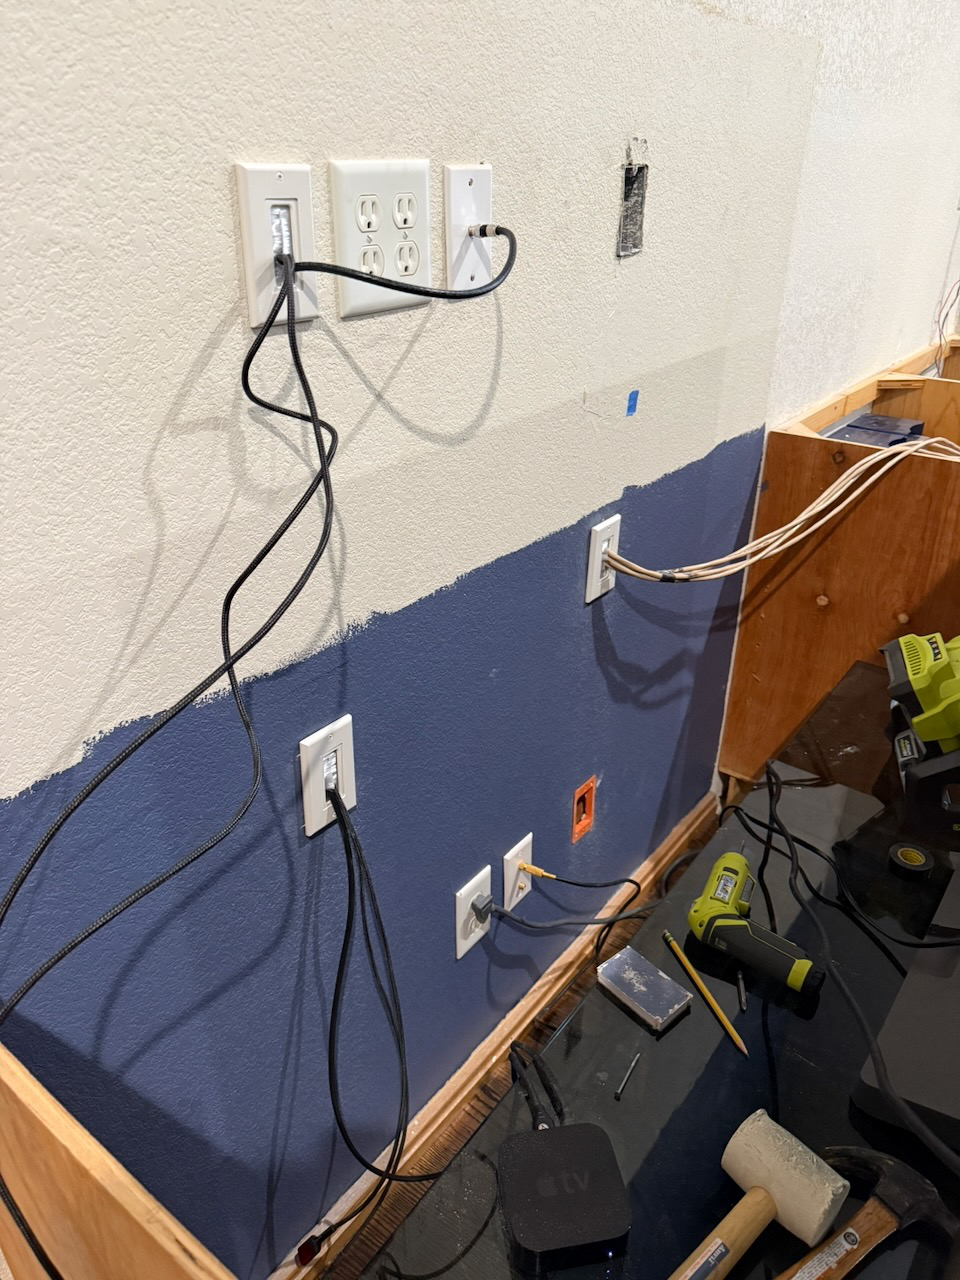
Phase 04 — Electrical
New outlets were added at counter height for electronics, speaker wires were routed inside the wall, and HDMI/signal cables were run to the TV location before any shiplap went up. Do this now — not after.
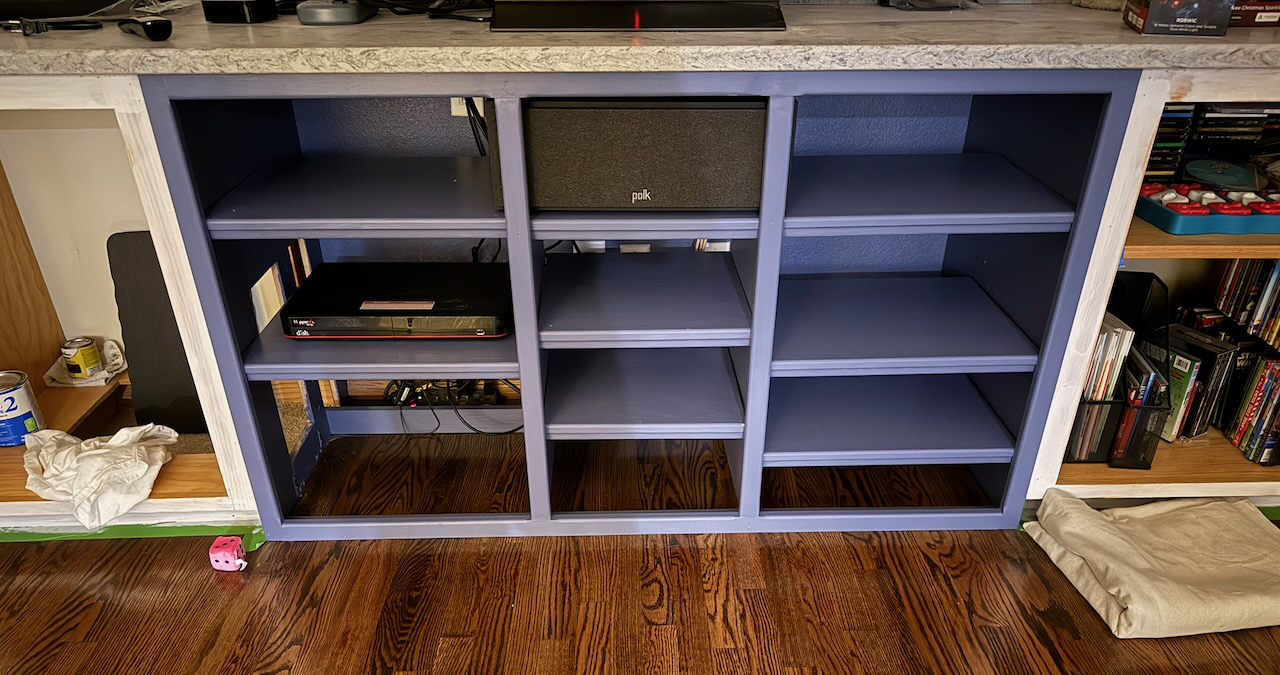
Phase 05 — Media Center Build
The center media unit was built new — a framed carcass installed between the two existing lower base cabinets. Rather than buying new lumber, I used the solid wood salvaged from the demo to frame it out. It houses the AV receiver, game consoles, and all streaming gear in an open cubby layout.
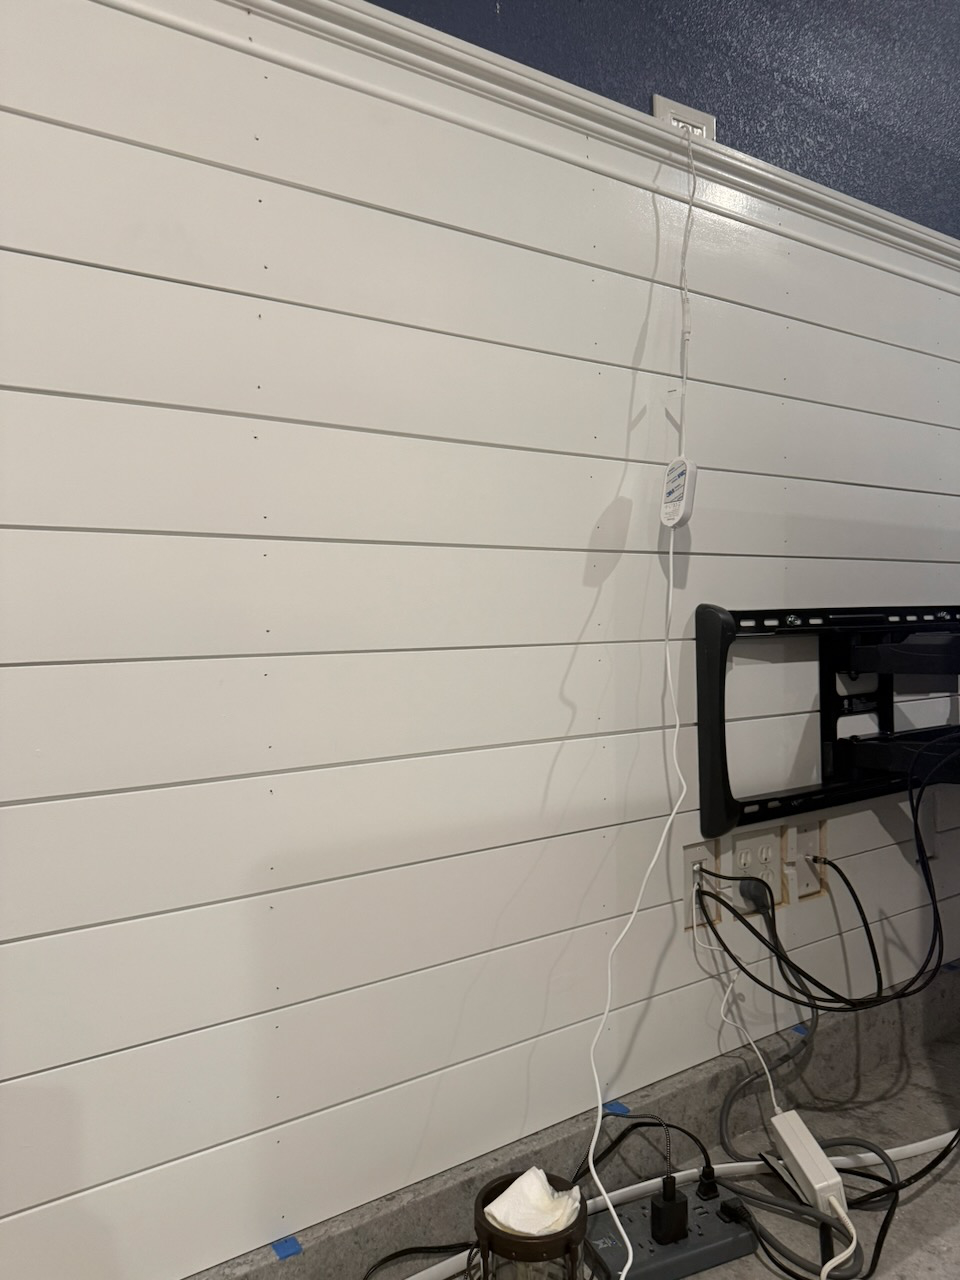
Phase 06 — Shiplap
White-painted shiplap boards were cut, painted in the living room, and installed horizontally from the countertop up to the crown molding. The horizontal lines create a visual width that makes the whole wall feel deliberately designed.
Phase 07 — Cabinet Refresh
The original oak base cabinets got a full makeover: the doors were removed, painted Distance Blue, fitted with new brushed nickel hardware, and reinstalled. The transformation of those doors alone changed the feel of the entire wall.
What We Used
The Payoff
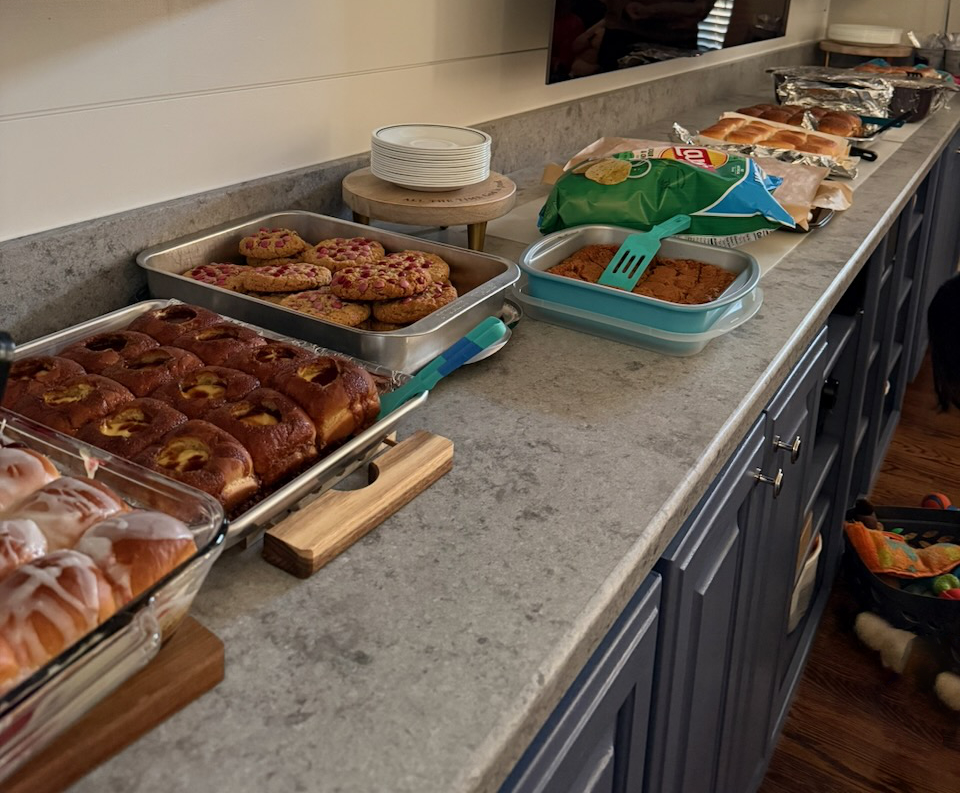
The whole reason for the quartz countertop running wall-to-wall was this: when family comes over, that surface becomes a full-length serving line. No more hauling in folding tables or trying to find counter space in the kitchen.
Cinnamon rolls, cookies, casseroles, chips — lay it all out and let people serve themselves while the game's on.
Movie Night Mode
LED strip lighting runs the full length behind the crown molding, casting a warm glow down the shiplap. Dim the overheads, fire up the strips, and the whole wall transforms — it stops being furniture and starts feeling like a theater.
Whether it's a Friday night movie, a Saturday game day, or just background ambiance while the kids do homework — this wall earns its place every single evening.
The Finished Result
Modern. Clean. Ready for movie nights, game days, and everything in between — with a counter long enough to feed the whole family.